安装
脚本适用于:Debian 9+ / Ubuntu 18.04+ / Centos7+
Vmess+websocket+TLS+Nginx+Website
1
bash <(curl -L -s https://raw.githubusercontent.com/wulabing/V2Ray_ws-tls_bash_onekey/master/install.sh) | tee v2ray_ins.log
安装过程需要输入一个域名地址,需要将VPS 的 IP 地址解析到你的域名,二级域名也可以,解析域名与安装配置域名一致即可,安装脚本配置端口选择443(默认)。
基本就是喝点水等着就行。安装成功相应的网站也可以访问了,也就是前边配置的域名。
Mac 客户端: V2rayU
ps:脚本管理命令
启动 V2ray:
1
systemctl start v2ray
停止 V2ray:
1
systemctl stop v2ray
启动 Nginx:
1
systemctl start nginx
停止 Nginx:
1
systemctl stop nginx
脚本相关目录 Web 目录:
1
/home/wwwroot/levis
V2ray 服务端配置:
1
/etc/v2ray/config.json
V2ray 客户端配置:
1
执行安装时所在目录下的 v2ray_info.txt
Nginx 目录:
1
/etc/nginx
证书目录:
1
/data/v2ray.key 和 /data/v2ray.crt
安装BBR原版/BBR魔改/BBR plus/锐速 四合一(一键/切换)脚本
1
apt-get -y install ca-certificates或yum -y install ca-certificates
安装
1
wget "https://github.com/chiakge/Linux-NetSpeed/raw/master/tcp.sh" && chmod +x tcp.sh && ./tcp.sh
1、先在[1 – 3]切换内核(第一次显示为bbr内核也要切换一遍),重启
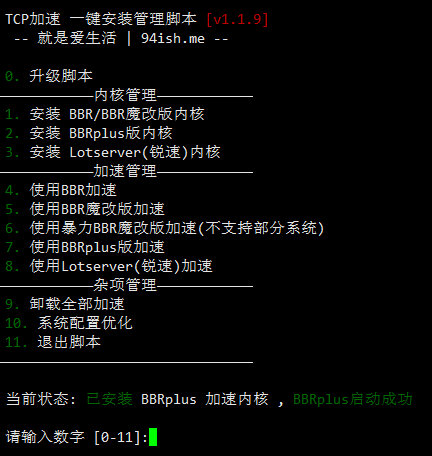
出现这个选no

2、重启后不用再下载脚本,直接 ./tcp.sh ,在[4 – 8]中选你要开的加速
- 安装 BBR/BBR魔改版内核” 对应4,5,6(原版,魔改,暴力魔改)
- 安装 BBRplus版内核 ” 对应7(plus)
- 安装 Lotserver(锐速)内核” 对应8(锐速)